
우리는 일반적으로 웹브라우저를 통해 HTTP 요청을 주고받는다.
즉, 웹브라우저에서 요청(Request)을 보내면 응답(Response)을 받게 된다.
이때, 응답의 헤더(Header)에는 상태 코드가 포함되며, 본문(Body)에는 HTML 문서가 담겨 있다.


웹 브라우저는 단지 HTML을 렌더링 해주는 프로그램
이 역할을 파이썬 코드로 대신할 수 있다.
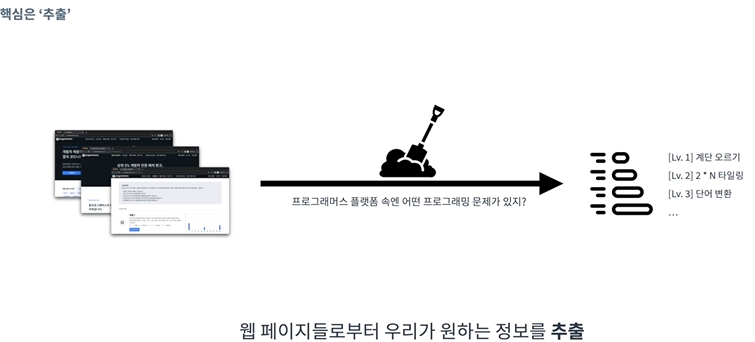
그리고 원하는 정보를 가져오기 위해서는 HTML 태그를 정확히 파악해야 한다 .
웹 크롤링 vs 웹 스크래핑

크롤링은 웹 크롤러 라고 불리는 데이터 수집 소프트웨어 및 봇을 활용
크롤러는 한 페이지에서 시작해 그 페이지에 연결된 모든 링크를 따라가며 데이터를 수집
크롤링은 구글, 네이버와 같은 검색 엔진이 웹 페이지를 인덱싱(Indexing)하는 데 사용
인덱싱은 웹 페이지의 내용을 분석하고 체계적으로 정리하여 데이터베이스에 저장하는 과정을 의미한다.
이를 통해 검색 엔진은 사용자에게 관련성 높은 검색 결과를 빠르게 제공할 수 있다.
반면 스크래핑은 특정 웹 페이지에서 필요한 정보를 추출하는 작업
연결된 링크를 따라가며 웹사이트의 전체 데이터를 수집하는 크롤링과 달리,
스크래핑은 특정 웹 페이지에서 필요한 정보만 추출한다.
Jupyter Lab
일반적인 IDE와 달리 Interactve하게 Python 코드 작성
즉 코드에 주석만 다는 것이 아닌 체계적인 설명으로 하나의 큰 Flow를 보여줄 수 있다.
이를 이용해 Notebook이라 하는 Python+Markdown 문서를 만들 수 있다.
notebook 외에도 console, 다른 파일들을 브라우저에서 보거나 활용할 수 있게 하는 프로그램이다.
설치
pip install jupyterlab
jupyter lab
pip는 python 안에 있는 package 관리자 (python을 설치하면 기본적으로 내장)
활용
JupyterLab은 2종류의 모드와 2가지의 Cell이 있다.


- Esc: 명령 모드
- Y: Code Cell
- M: Markdown Cell
- A: 현재 셀 위에 셀 만들기
- B: 현재 셀 아래에 셀 만들기
- dd: 현재 샐 삭제
- Enter: 편집 모드
- ctrl + Enter : 셀 실행하기(Code) / 형식 반영하기(Markdown)
파이썬 이용한 HTTP 통신, BeautifulSoup
%pip install requests

import requests

res=requests.get("https://www.naver.com")
res  # HTTP응답이 담겨있음.(객체)
res.headers
res.text[:1000] #body정보, 너무 많은 정보.. 우리는 일부분만 얻고 싶어

payload = {"name": "Hello", "age": 13}
requests.post("https://webhook.site/950e526f-1c84-43c3-b617-68646fe189d3",payload)
res.status_code
get은 어떤 정보를 요청, post는 어떤 정보를 보내면서 갱신을 요청
get 할때의 문제점은 body가 너무 복잡한 것
우리가 원하는 내용은 한정. 따라서 Html코드를 잘게 분석해 특정요소가 어디있는지 찾아주는 HTML Parser가 필요하다.
즉 스크래핑을 하기 위해서는 request와 HTML parser를 함께 사용한다.
이러한 HTML 분석해주는 파이썬 라이브러리가 BeautifulSoup
import requests
from bs4 import BeautifulSoup

res = requests.get("https://www.example.com")
soup= BeautifulSoup(res.text, "html.parser")
print(soup.prettify())

# HTML의 특정 요소 가져오기
soup.title
soup.head

h1=soup.find("h1")
soup.find_all("p") # p인 태그 여러개 리스트로 반환
BeautifulSoup 객체로 특정 요소 가져올 수 있다.
책 이름 스크래핑 (content 기반으로 스크래핑)
좋은 방법은 아니다. 왜냐하면 웹사이트 구조 바뀌는 경우 많기 때문에
웹 페이지의 책 제목이 요소가 어디 있는지 F12개발자 도구로 확인한다.
아니면 해당 요소 우클릭 하고 검사 누르면 표시된다.

h3태그안에 제목정보들이 있는것을 볼 수 있다.
순전히 관찰을 통해서 얻은
import requests
from bs4 import BeautifulSoup

res = requests.get("http://books.toscrape.com/catalogue/category/books/travel_2/index.html")
soup = BeautifulSoup(res.text,"html.parser")

h3_results = soup.find_all("h3")

for book in h3_results:
    print(book.a["title"]) # book_list에서 우리가 원하는 제목(title)만 추출
book.a.text -> 이러면 잘려서 나온다.
book.a["title"]
특정 태그 이름만으로 가져온다면 원치 않는 정보도 가져올 수 있다. (너무 많으니까)
HTML locator인 id와 class를 이용해서 HTML의 특정 태그를 지칭하고 가져와보자
soup=BeautifulSoup(res.text,"html.parser")

soup.find("div",id="results")  # id가 results인 div 태그를 찾아본다.

find_result=soup.find("div","page-header") # class가 "page-header"인 div 태그를 찾아본다.
find_result.h1.text.strip() # 위 결과에서 text 값을 깔끔하게 가져와봅시다.
페이지의 질문 제목 스크래핑 해보자

페이지네이션(Pagination)
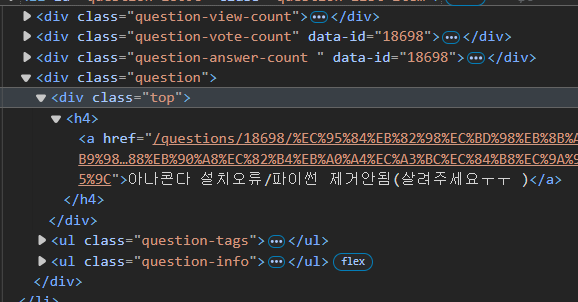
h4안에 문제의 제목이 있다. li태그들 중 class가 question-list-item을 모두 긁어오자.
페이지는 보통 Query String을 통해서 구분하므로
for i in range(1,6):
    res=requests.get("https://hashcode.co.kr/?page={}".format(i),user_agent)
    soup=BeautifulSoup(res.text,"html.parser")

    questions=soup.find_all("li","question-list-item")
    for question in questions:
        print(question.find("div","question").find("div","top").h4.text)
    time.sleep(0.5)
각 page에 대해 보낸 요청에 대한 객체 만들고
각 페이지의 모든 question-list 에 대해 출력
한번에 하면 서버에 부하를 줄 수 있으므로 시간차 두고
Selenium
웹은 JavaScript를 통해 동적으로 작동한다.
1) 정적 웹사이트는 HTML 문서가 서버에서 완전한 형태로 바로 응답되지만,
동적 웹사이트는 요청에 대한 응답 후, HTML이 브라우저에서 렌더링될 때까지 지연 시간이 발생할 수 있다.

비동기 상황에서는 렌더링과 데이터 처리가 동시에 이루어지기 때문에,
데이터를 모두 처리할 때까지 기다리는 방법
2) 또한 HTTP 요청은 단순히 문서를 받아오는 것이기 때문에,
키보드 입력이나 마우스 클릭 같은 UI 상호작용을 처리하기 어렵다. 이러한 이벤트들을 프로그래밍적으로 처리할 수 있다.
따라서 지금까지는 웹브라우저를 대체하하기 위 파이썬 코드를 사용했다.
웹 브라우저를 사용하면서 Python으로 조작는 방법을 쓰고 이것을 가능하게 해주는것이
웹브라우저 자동화 라이브러리인 Selenium
웹브라우저를 쓰고 파이썬으로 조작하면 어떨까 이것을 가능하게 하는 것은 웹 브라우저 자동화 라이브러리 Selenium
Selenium은 실제 웹 브라우저를 통해 사이트에 접근하므로 좋은 도구로 활용될 수 있다.
사용 법
Selenium은 Python을 이용해 웹 브라우저를 자동으로 제어할 수 있는 프레임워크
Selenium으로 브라우저와 연동하려면 WebDriver가 필요하다.
WebDriver는 브라우저를 직접 제어하는 프로그램으로, 브라우저와 Python 코드 간의 상호작용을 가능하게 한다.
from selenium import webdriver
from selenium.webdriver.chrome.service import Service
from webdriver_manager.chrome import ChromeDriverManager

# driver = webdriver.Chrome(service=Service(ChromeDriverManager().install()))

with webdriver.Chrome(service=Service(ChromeDriverManager().install())) as driver:
	driver.get("http://www.example.com")
	print(driver.page_source) # Response의 HTML문서 출력
Chrome을 제어하려면 webdriver.Chrome()을 통해 ChromeDriver 객체를 생성해야 한다.
이렇게 하면 Chrome 브라우저가 열리고, 이를 Python 코드로 제어할 수 있습니다.
Python 코드와 브라우저는 WebDriver를 통해 연동된다.
with 구문을 사용하면 자동으로 드라이버를 종료시켜준다.
Selenium을 사용하면 드라이버 객체를 통해 여러 명령을 브라우저에 내릴 수 있고, 웹 페이지 스크래핑도 가능하다.
.find_element(by, target)
.find_elements(by, target)
from selenium.webdriver.common.by import By

# p 태그에 해당하는 요소 여러개를 찾아봅시다.

with webdriver.Chrome(service=Service(ChromeDriverManager().install())) as driver:
    driver.get("http://www.example.com")
    for element in driver.find_elements(By.TAG_NAME,"p"):
        print("Text:",element.text)
지금까지 Selenium WebDriver를 사용해 브라우저에서 요청을 보내고, 응답을 받아 웹 페이지의 특정 요소를 가져오는 방법
XPath
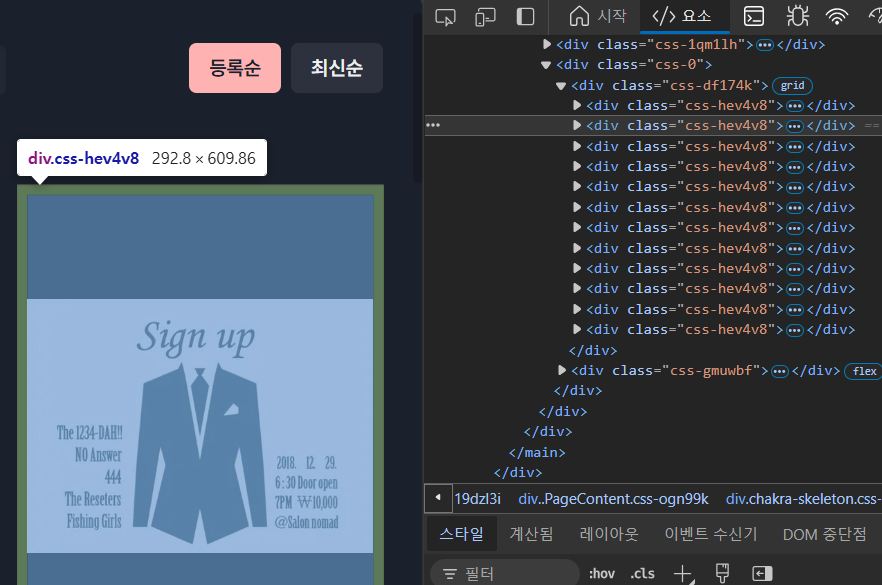
요즘은 class name을 임의로 설정해 웹 스크래핑을 방지한다.
class의 이름은 바뀌지만 구조는 바뀌지 않기 때문에 위치 정보를 중심으로 scrapping -> XPath이용
Wait & Call
어떤 작업을 할때 단순히 요청하고 응답 받는것이 아닌 특정한 조건에 따라 기다림을 진행할 수 있다.
from selenium import webdriver
from selenium.webdriver.chrome.service import Service
from selenium.webdriver.common.by import By
from webdriver_manager.chrome import ChromeDriverManager

driver = webdriver.Chrome(service=Service(ChromeDriverManager().install()))
driver.get("https://indistreet.com/live?sortOption=startDate%3AASC")
driver.find_element(By.XPATH,'//*[@id="__next"]/div/main/div[2]/div/div[4]/div[1]/div[1]/div/a/div[2]/p[1]').text
오류가 생긴다.
페이지가 렌더링되기까지 시간이 걸리는 경우 get() 메서드로 페이지를 호출한 직후에 요소를 찾으려고 하면,
페이지가 아직 로딩되지 않았기 때문에 요소를 찾을 수 없다는 오류가 발생할 수 있다.
1) implicit wait (특정시간 동안 기다리기)
with webdriver.Chrome(service=Service(ChromeDriverManager().install())) as driver:
    driver.get("https://indistreet.com/live?sortOption=startDate%3AASC")
    driver.implicitly_wait(10)
    print(driver.find_element(By.XPATH,'//*[@id="__next"]/div/main/div[2]/div/div[4]/div[1]/div[1]/div/a/div[2]/p[1]').text)
10초를 항상 기다리는 것이 아닌 그전에 완전한 응답이 오면 다음 줄로 진행한다.
2) explicit wait (특정 요소가 준비되면)
from selenium.webdriver.support import expected_conditions as EC

with webdriver.Chrome(service=Service(ChromeDriverManager().install())) as driver:
    driver.get("https://indistreet.com/live?sortOption=startDate%3AASC")
    element = WebDriverWait(driver, 10).until(EC.presence_of_element_located((By.XPATH,'//*[@id="__next"]/div/main/div[2]/div/div[4]/div[1]/div[1]/div/a/div[2]/p[1]')))
    print(element.text)
WebDriverWait() 과 until() 을 통해
특정 인자의 조건이 만족될 때까지
예를 들어, id가 target인 요소가 존재할 때까지 기다린 후 다음 명령을 진행한다.
element = WebDriverWait(driver, 10).until(EC.presence_of_element_located((By.ID, "target")))이때, EC는 expected_conditions로, selenium에서 정의된 조건들이다. (~가 존재하면, ...)
공연 페이지의 공연 제목들에 해당하는 XPath는 다음과 같고 다음과 같이 코드를 짤 수 있다.
//*[@id="__next"]/div/main/div[2]/div/div[4]/div[1]/div[1]/div/a/div[2]/p[1]
//*[@id="__next"]/div/main/div[2]/div/div[4]/div[1]/div[2]/div/a/div[2]/p[1]
//*[@id="__next"]/div/main/div[2]/div/div[4]/div[1]/div[3]/div/a/div[2]/p[1]

with webdriver.Chrome(service=Service(ChromeDriverManager().install())) as driver:
    driver.get("https://indistreet.com/live?sortOption=startDate%3AASC")
    driver.implicitly_wait(10)

    for i in range(1,11):
        element=driver.find_element(By.XPATH, '//*[@id="__next"]/div/main/div[2]/div/div[4]/div[1]/div[{}]/div/a/div[2]/p[1]'.format(i))
        print(element)
selenium을 통해서 특정 위치에 있는 요소 가져오는 법, 그리고 비동기 상황에서 정보 가져오는 법을 알아보았다.
마우스 키보드 이벤트 처리하기
로그인 자동으로 해보기
import time
driver = webdriver.Chrome(service=Service(ChromeDriverManager().install()))
driver.get("https://hashcode.co.kr/")
time.sleep(0.5)

# 내비게이션 바에서 "로그인" 버튼을 찾아 눌러봅시다.
button=driver.find_element(By.XPATH,'//*[@id="main-app-header"]/header/section/div/div/div/a[1]')
ActionChains(driver).click(button).perform()
time.sleep(0.5)

# "아이디" input 요소에 여러분의 아이디를 입력합니다.
id_input = driver.find_element(By.XPATH,'//*[@id="main-app-account"]/div/div[2]/div/div[2]/div[1]/div/div/div[2]/div[1]/input')
id_input.send_keys("sjisno.1@gmail.com")
time.sleep(0.5)

# "패스워드" input 요소에 여러분의 비밀번호를 입력합니다.
pw_input = driver.find_element(By.XPATH,'//*[@id="main-app-account"]/div/div[2]/div/div[2]/div[1]/div/div/div[2]/div[2]/input')
pw_input.send_keys("psj1208!!!")
time.sleep(0.5)

# "로그인" 버튼을 눌러서 로그인을 완료합니다.
login_button=driver.find_element(By.XPATH,'//*[@id="main-app-account"]/div/div[2]/div/div[2]/div[1]/div/div/div[3]/button')
ActionChains(driver).click(login_button).perform()
time.sleep(0.5)
너무 action들 빠르게전환하다보면 에러 날 수 있으므로 중간중간에 interval을 준다.
Seaborn
지금까지 request, BeautifulSoup, Selenium를 이용해 스크래핑을 진행할 수 있었다.
이제는 모은 정보를 시각화 해보자.
기본적으로 matplotlib을 많이 사용하지만 그거를 기반으로 한 Seaborn 도 많이 사용한다.
lineplot
barplot
x와 y를 명시한다.
plot의 속성 부여할 수도 있다.
스크래핑 시 주의 점
1. 요청하고자 하는 서버에 과도한 부하를 주지 않는다.
2. 가져온 정보를 사용할 때 저작권과 데이터베이스권에 위배되지 않는지 주의한다.
로봇들의 무분별한 접근을 통제하기 위해 robots.txt 마련
'User-agent' : 규칙이 적용되는 대상 사용자 에이전트
'Disallow' : 크롤링을 금지할 웹 페이지
'Allow' : 크롤링을 허용할 웹 페이지
요청이 거부 당할 때 UserAgent를 변경해보자. www.naver.com/robots.txt
출처: 데브코스 데이터엔지니어링 4기